
Installing a new HVAC system is one of the most important investments a homeowner can make to improve comfort, energy efficiency, and indoor air quality. Whether you’re replacing an aging unit or upgrading to a modern system, understanding the process helps you feel confident and prepared. A well-planned installation ensures that your new heating and cooling system performs efficiently for years to come. From pre-installation assessments to system testing, every step plays a vital role in long-term reliability. Homeowners who understand what to expect can make informed decisions and ensure a smooth installation experience from start to finish.
We Will Explore the Initial Assessment and Planning Stage
Before any installation begins, your contractor will evaluate your home’s layout, insulation, and existing ductwork to determine the right system size and type. We will explore how this careful assessment ensures your new system fits your home’s unique requirements. Improper sizing can lead to uneven temperatures, increased energy bills, and premature system wear. During this phase, technicians calculate load capacity, assess airflow needs, and identify any modifications required to improve system performance. Planning also involves discussing options for energy-efficient units, thermostat placement, and potential upgrades such as zoning systems. This preparation is crucial for achieving balanced comfort and long-term savings. By investing time in thorough pre-installation analysis, homeowners can prevent costly mistakes and ensure that every component of the system operates at peak efficiency once installed.
We Will Explore the Removal of the Old System and Preparation
Once the new HVAC system is chosen, the next step is safely removing the old one. We will explore how technicians dismantle outdated equipment and prepare your home for the new installation. The removal process involves disconnecting old wiring, refrigerant lines, and duct connections with care to prevent damage to surrounding structures. During this stage, technicians inspect the existing ductwork and foundation to ensure they’re free of leaks or debris. Cleaning and sealing the ducts is often recommended to improve airflow and air quality before the new unit is connected. Some homes may require electrical upgrades or new mounting platforms to support the new system. Many customers who schedule Mesa HVAC repair services around this stage also benefit from identifying hidden inefficiencies that can be corrected before installation. A clean, well-prepared environment allows the new system to be installed efficiently and function properly from day one.
We Will Explore the Installation of the Indoor Unit
The installation process begins with setting up the indoor unit, whether it’s a furnace, air handler, or combination system. We will explore how careful placement and connection of this unit affect your home’s comfort and air distribution. Technicians ensure the unit is securely positioned, with sufficient space for future maintenance and airflow. Electrical wiring, refrigerant lines, and drain piping are then connected to ensure smooth operation—the installation team checks for tight seals and proper insulation to prevent air leaks. Attention to detail at this stage helps maintain efficiency and minimize noise levels. Additionally, technicians confirm that the thermostat and control systems are calibrated correctly for precise temperature regulation. Once the indoor unit is in place, the focus shifts to the outdoor condenser or heat pump, ensuring the entire system is balanced and integrated for maximum performance and longevity.
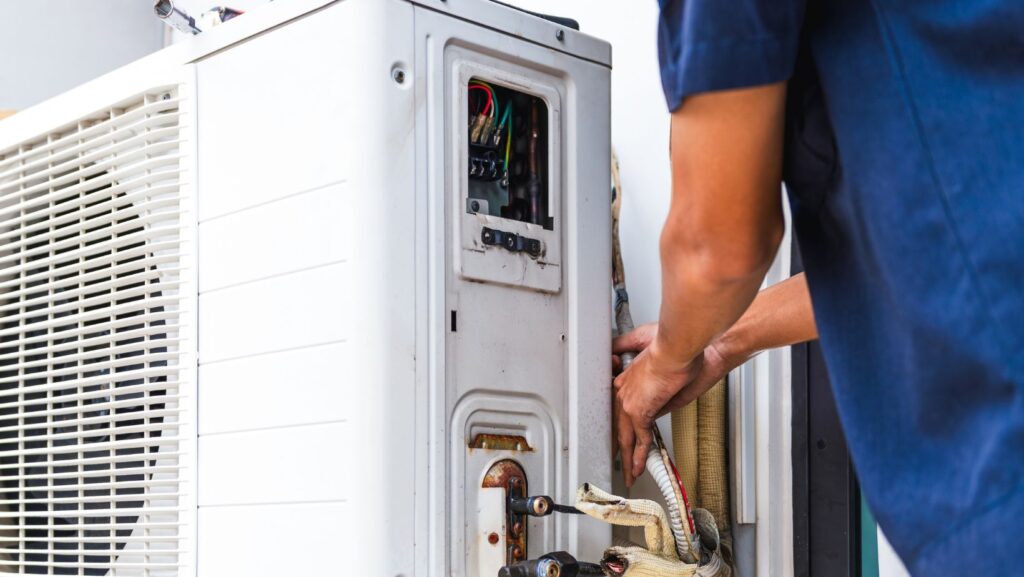
We Will Explore the Installation of the Outdoor Unit
The outdoor unit plays a critical role in cooling and heat exchange, and its proper setup ensures efficient performance. We will explore how technicians position and secure this component to enhance airflow and minimize noise. The condenser must be placed on a stable, level surface, ideally away from debris or obstructions. Adequate clearance ensures that air can circulate freely around the coils, improving system performance. Technicians connect refrigerant lines and electrical wiring between the indoor and outdoor units, then pressurize the system to test for leaks. They also ensure the outdoor location minimizes exposure to direct sunlight or heavy moisture, both of which can affect efficiency. Properly anchoring and insulating the outdoor unit also reduces vibrations, helping maintain a quieter environment. Once installed, the system begins to take shape as both indoor and outdoor components work together seamlessly to regulate your home’s temperature.
We Will Explore the Ductwork and Airflow Balancing Process
Even the most advanced HVAC system cannot perform well without proper airflow management. We will explore how technicians assess and balance airflow throughout your home to achieve consistent comfort in every room. Ductwork inspections identify leaks, blockages, or damaged sections that could reduce efficiency. Adjustments are then made to ensure even distribution of conditioned air. Proper airflow balancing eliminates temperature differences between rooms and reduces the workload on your HVAC system. Technicians may install dampers or modify duct sizing to improve airflow. This stage also includes insulation checks to prevent air loss and maintain energy efficiency. A well-balanced airflow system improves comfort while lowering utility bills and minimizing unnecessary strain on components. It’s one of the most vital parts of the installation process, ensuring your new system delivers reliable performance from the very start.
We Will Explore the Final Testing and System Calibration
The final phase of installation focuses on ensuring every component operates correctly. We will explore how technicians test and calibrate the system for optimal performance. They begin by checking refrigerant levels, verifying electrical connections, and ensuring thermostat accuracy. Airflow is measured and adjusted to maintain consistent temperature control. Technicians also listen for unusual noises or vibrations that could indicate installation errors. During testing, safety protocols are reviewed to ensure the system meets local codes and manufacturer standards. Once everything is confirmed to be functioning correctly, the installation team provides homeowners with instructions on operating the system, maintaining filters, and scheduling regular maintenance. This final step is crucial for achieving long-term reliability and preventing early wear. Homeowners who take the time to learn these details can ensure their system continues running efficiently throughout the changing seasons.

A professional HVAC installation is more than just setting up equipment—it’s a detailed process that ensures lasting comfort, energy efficiency, and reliability. From pre-installation planning to final testing, every step plays a vital role in achieving peak performance. Understanding what to expect helps homeowners make informed decisions and reduces stress during installation. A properly installed system not only provides better temperature control but also enhances indoor air quality and reduces long-term maintenance costs. When homeowners stay involved and informed throughout the process, they set the foundation for years of dependable comfort and peace of mind in every season.
More Stories
Professional Air Conditioning Diagnostics: Ensuring Peak Performance
Tankless Water Heaters vs Traditional Units: Which Is Right for Your Home?
What makes an online platform look trustworthy to users