
So, you’ve decided to upgrade your home with new cladding—congratulations! But here’s the key: what happens before the first panel goes up matters just as much as the installation itself. Proper prep now can prevent headaches, costly fixes, and delays later. Let’s walk through the essential steps to get your home ready for a smooth, long-lasting cladding project.
Why Proper Preparation Matters
You wouldn’t slap paint on a dirty wall and expect it to stick, right? Same deal here. Cladding needs a clean, solid surface to perform its best. Skip the prep, and you’re asking for trouble down the road.
There’s also the surprise factor to think about. Mid-project discoveries—like hidden rot or water damage lurking behind old boards—can derail your timeline fast. Nobody wants that phone call from their contractor. “Hey, we found something…” Those words never end cheaply.
Here’s another angle. When everything’s ready to go, crews move faster. They’re not working around obstacles or waiting on decisions. You get your life back sooner.
Assess Your Current Siding Condition
Take a lap around your house. Really look at what’s there. Cracks jumping out at you? Boards that feel soft when you press on them? Paint that flakes off if you so much as sneeze near it? These aren’t cosmetic issues. They’re warnings.
Pay extra attention around windows and doors. Water loves sneaking in at these spots. Foundation areas, too. If you see dark stains, bubbling, or anything that smells musty, you’ve got moisture problems.
While you’re at it, check the trim and fascia. People forget about these, but they take a beating from the elements. Snap some photos of anything sketchy. Your contractor will thank you—it helps them quote accurately and plan for what’s coming.
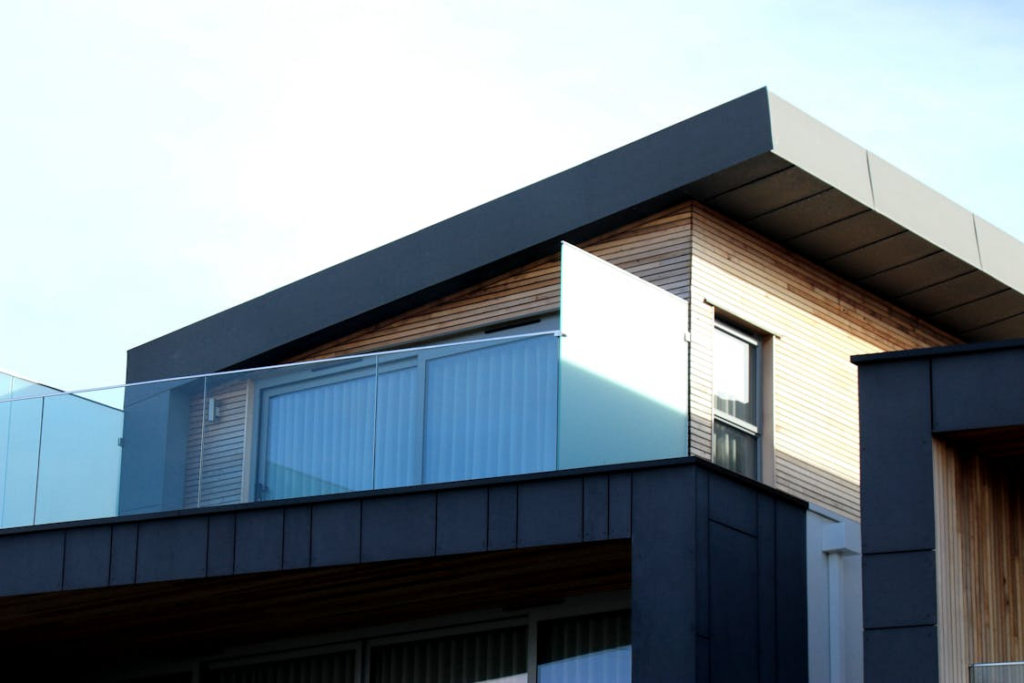
Choose the Right Materials for Your Bay Area Home
Living near the coast means your cladding faces fog, salt air, temperature swings, and the occasional downpour. Not every material can handle those conditions well.
If you are near San Leandro, homeowners considering siding replacement in San Leandro often focus on three popular options: fiber cement, vinyl, or engineered wood. Fiber cement resists moisture and termites, making it extremely durable. Vinyl is budget-friendly and comes in nearly any color, while engineered wood delivers a classic look without the ongoing maintenance real wood requires.
Think about your home’s character, too. A charming Craftsman deserves materials that honor its style, while a sleek mid-century design calls for a different approach. Whatever you choose should feel like a natural part of your home, not an afterthought.
Don’t forget energy efficiency. Many modern siding options include built-in insulation, helping your home stay comfortable through temperature swings and saving on utility bills over time.
Clear the Work Area Around Your Home
Before the crew shows up, create breathing room around your house. Drag patio furniture, planters, and that grill you keep meaning to clean—move it all at least ten feet from the walls.
Got bushes hugging the foundation? Trim them back. Workers need space to do their jobs safely, and overgrown plants get trampled during construction.
Delicate landscaping deserves protection. Toss some tarps over flower beds and anything fragile. Debris happens. Nails drop. A little covering goes a long way.
Inside the house, take down pictures and shelves on the walls that share the exterior. Hammers and nail guns create vibrations. That framed photo of your anniversary trip? It doesn’t need to become a casualty.
Communicate with Your Contractor
Talk to your contractor. Ask about the schedule—when work will start each day, how long each phase should take, and what to expect at every step. No question is too basic.
Figure out logistics early. Where will trucks park? Where will materials be stored? If you have a narrow driveway or limited street parking, resolve it before day one. Homeowners often look to experienced providers such as M&M home remodeling services for guidance on planning, prep expectations, and smooth communication throughout a project,
Got pets that bark at strangers? Kids doing remote learning? Elderly parents who nap in the afternoon? Let your contractor know—good teams adapt to your household’s needs.
Decide how you’ll stay in touch during the project. Some people prefer daily updates, while others like a quick text only when something needs attention. Find what works for both of you and stick with it.
Preparing for new cladding doesn’t have to be complicated. Handle these steps, and installation day becomes exciting instead of stressful. When you’re ready, a skilled remodeling team can take it from here.
FAQs
How long does a typical cladding installation take?
Figure one to two weeks for most homes. Larger projects or unexpected repairs can push that longer.
Do I need to be home during installation?
You don’t have to hover. But being reachable helps. Questions pop up, and quick answers keep things moving. Many homeowners like doing a brief walkthrough at the end of each day.
Will new cladding increase my home’s value?
It really does. Fresh siding boosts curb appeal instantly. Buyers notice, and appraisers do too. You’ll enjoy the benefits now and see returns if you ever sell.
Can old siding be installed over existing materials?
Technically, yes. But it’s not always smart. Layering hides problems underneath. A professional inspection tells you whether removal makes more sense for your situation.
More Stories
Casino Bonuses for Beginners: How to Avoid Traps and Use Offers Wisely
How to Troubleshoot a Broken Furnace During a Winter Storm
How Real Estate Enterprises Are Protecting AI Systems Against Cybersecurity Threats