
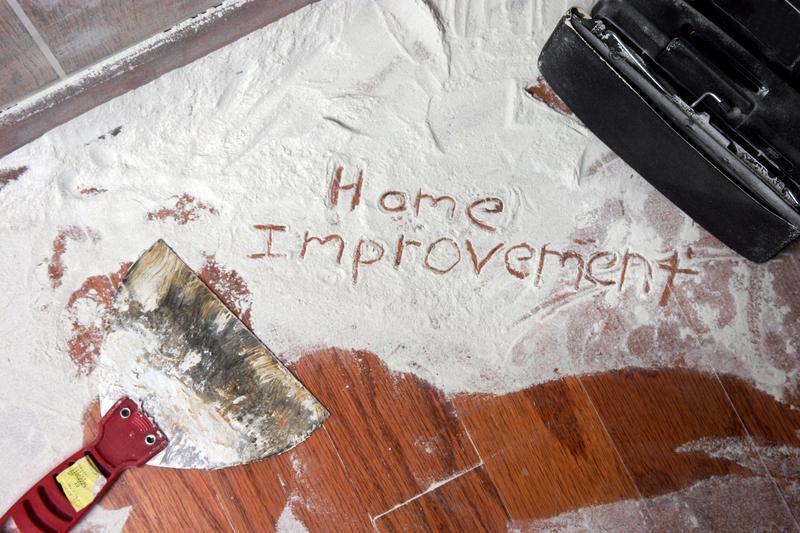
A home improvement project can be exciting in the beginning. You imagine the finished room, the cleaner layout, the fresh paint, the better storage, the brighter kitchen, or the bathroom that no longer looks like it has been quietly plotting against you since 1997. But between the idea and the finished result, there is a very important step that many homeowners rush through: planning.
Good planning can make the difference between a satisfying project and a stressful one. It helps you avoid surprise costs, delays, wrong materials, unfinished work, and those dreaded moments when you realize the thing you just removed was hiding three other problems. Whether you are painting a bedroom, remodeling a bathroom, building a deck, updating a kitchen, or refreshing a living room, the work should begin before the tools come out.
Planning does not remove every challenge. Homes are full of surprises. Walls conceal pipes. Floors hide unevenness. Measurements betray the overconfident. But a clear plan gives you a better chance of staying on budget, finishing on time, and getting the result you actually wanted.
Start With the Main Goal
Before choosing colors, materials, fixtures, or finishes, define the main goal of the project. What problem are you trying to solve?
A home improvement project may begin with a general feeling, such as “this room feels outdated” or “we need more space.” That is a good starting point, but it is not specific enough to guide decisions. Try to identify the real purpose behind the project.
Are you trying to improve function? Add storage? Increase home value? Make the space safer? Create a more comfortable room? Prepare the home for sale? Improve energy efficiency? Make the space easier to clean? Update the style?
For example, if the goal is to make a kitchen more functional, your decisions should focus on layout, storage, lighting, workflow, and durable surfaces. If the goal is to make a guest room feel more welcoming, you may focus on paint, bedding, lighting, window treatments, and furniture placement.
A clear goal keeps the project from expanding in every direction. Without it, a simple bathroom refresh can somehow become a hallway flooring replacement, a linen closet overhaul, and a philosophical crisis about towel bars.
Decide What Is Included and What Is Not
Once the main goal is clear, define the scope of the project. Scope simply means what the project includes.
This step is important because home improvement projects love to grow. You start by replacing a vanity, then decide the mirror looks wrong. Then the light fixture looks dated. Then the floor suddenly seems unacceptable. Then you are looking at tile samples at midnight wondering who you have become.
Write down exactly what you plan to do. For example, a bathroom refresh might include painting the walls, replacing the mirror, changing cabinet hardware, installing a new faucet, and updating towels. It might not include replacing the tub, moving plumbing, changing tile, or buying a new vanity.
Defining what is not included is just as valuable as defining what is included. It gives you permission to stop. It also helps you control cost and timeline.
Of course, plans can change if you uncover a real problem. But changes should be intentional, not the result of project momentum galloping through the house with a paint roller in its teeth.
Set a Realistic Budget
A budget should be created before shopping begins. It is easy to underestimate a home improvement project because the big items are obvious, but the smaller costs sneak in quietly.
Start by listing every expected expense. This might include materials, tools, hardware, fixtures, paint, primer, brushes, rollers, drop cloths, tile, grout, lumber, screws, adhesives, permits, rentals, delivery fees, disposal costs, contractor labor, and cleanup supplies.
Then add a contingency fund. This is extra money set aside for unexpected costs. For small projects, a 10% cushion may be enough. For larger projects, especially ones involving plumbing, electrical, structural work, or older homes, a larger cushion may be wise.
Be honest about what you can afford. A beautiful project that creates financial stress may not feel so beautiful once the bill arrives. If the full project is too expensive, break it into phases. You might paint and update lighting now, then replace flooring later. You might refresh cabinets with hardware before committing to a full kitchen remodel.
A good budget gives the project guardrails. It does not ruin creativity. It keeps creativity from driving into a ditch.
Gather Inspiration, But Stay Grounded
Inspiration is helpful, but it can also become overwhelming. Home improvement websites, design blogs, magazines, social media, and stock photos of interiors can all help you identify styles, layouts, colors, and materials you like. Visual references are especially useful when you need to explain your ideas to a contractor, partner, or even yourself.
The key is to use inspiration as a guide, not a command. A photo of a bright, airy kitchen may look beautiful because it has tall ceilings, giant windows, professional lighting, and a budget doing cartwheels in the background. Your room may have different dimensions, natural light, architecture, and practical needs.
As you gather inspiration, look for patterns. Do you keep saving rooms with warm wood tones? Black hardware? Soft neutral walls? Built-in storage? Vintage rugs? Clean lines? Natural textures? Those repeated choices tell you more than any single image.
Create a small inspiration board with your favorite examples, then narrow it down. Too many references can confuse the project. A focused set of visuals helps create consistency.
Measure Everything Carefully
Measurements are the tiny rulers of destiny. Get them wrong, and the entire project can become more complicated than necessary.
Measure the room, walls, windows, doors, ceiling height, existing fixtures, furniture, cabinets, appliances, and any areas where new materials will be installed. Write everything down clearly. Do not rely on memory. Memory is where measurements go to become expensive mistakes.
For projects involving furniture or fixtures, check clearances. Will doors open fully? Can drawers pull out? Is there enough room to walk around the bed, table, or island? Will a new vanity block a vent? Will the refrigerator door hit a wall? Will the rug be large enough for the furniture layout?
Measure more than once before buying materials. If you are ordering custom items, cabinets, countertops, blinds, or flooring, accuracy matters even more. When in doubt, ask a professional to verify measurements before placing expensive orders.
Decide What You Can DIY and What Requires a Pro
Not every home improvement task should be a DIY project. Painting, basic hardware replacement, simple shelving, landscaping, caulking, and cosmetic updates are often beginner-friendly. But electrical work, plumbing, structural changes, roofing, gas lines, major tile work, and anything involving permits may require professional help.
Be honest about your skills, tools, patience, and available time. DIY can save money, but only if the work is done safely and correctly. A project that has to be repaired by a professional later may cost more than hiring one from the beginning.
Consider the risk level. If a mistake would be mainly cosmetic, DIY may be reasonable. If a mistake could cause water damage, fire risk, injury, code violations, or structural problems, bring in someone qualified.
There is no shame in hiring help. A smart homeowner knows when to grab a paintbrush and when to step away from the breaker box.
Check Permits and Rules
Before starting a larger project, find out whether permits are required. Permit rules vary depending on location and project type, but they may apply to electrical work, plumbing, structural changes, additions, decks, fences, windows, roofing, HVAC, and major renovations.
If you live in a neighborhood with a homeowners association, review those rules as well. Exterior paint colors, fencing, landscaping, sheds, windows, doors, and additions may require approval.
Skipping permits can create problems later. It may affect insurance, resale, inspections, and safety. Even if the project seems simple, it is worth checking before work begins.
Contractors can often help with permits, but do not assume everything is handled unless it is stated clearly in the agreement.
Create a Project Timeline
A timeline helps you understand the order of work and how long the project may take. This is especially important if the project affects essential spaces like kitchens, bathrooms, bedrooms, or entryways.
Start by listing each step. For a room refresh, the timeline might include decluttering, patching walls, painting, installing shelves, changing hardware, hanging curtains, arranging furniture, and styling decor. For a larger remodel, the steps may include design, permits, demolition, rough plumbing or electrical work, inspections, drywall, flooring, cabinets, fixtures, paint, and cleanup.
Build in extra time for delays. Materials may arrive late. Paint may need another coat. A contractor may need to reschedule. A hidden issue may appear. Weather may interrupt outdoor work.
Try not to schedule the project around an unrealistic deadline, such as hosting a dinner party three hours after the final coat of paint is supposed to dry. That is how people end up eating pizza in a room that smells like primer and regret.
Choose Materials Before Work Begins
Choosing materials early helps prevent delays and budget problems. Paint colors, flooring, tile, fixtures, hardware, lighting, countertops, cabinets, trim, and fabrics should be selected before the project starts whenever possible.
Check availability before committing. Some materials may be backordered or discontinued. If you are working with a contractor, ask when materials need to be ordered so the schedule stays on track.
Bring samples home when possible. Paint, tile, wood, fabric, and flooring can look different under your lighting than they do in a store or online. Test paint on the wall and view it at different times of day. Look at flooring samples near existing furniture and trim. Compare hardware finishes to lighting and faucets.
Materials should look good together, but they should also fit your lifestyle. A delicate surface may not be ideal for a busy family kitchen. A high-maintenance finish may not be worth the trouble in a bathroom. Beauty matters, but durability, cleaning, and daily use matter too.
Prepare the Space
Before the work begins, prepare the room or area. Move furniture, remove wall decor, protect floors, cover vents if needed, and create a safe workspace. If contractors will be coming in, clear paths from the entrance to the project area.
For messy projects, think about dust control. Plastic sheeting, zip walls, drop cloths, and closed doors can help keep dust from traveling. For painting, clean the walls and protect trim, floors, and furniture. For flooring projects, remove fragile items from nearby shelves because vibration and movement can knock things loose.
Also consider how the project will affect daily life. If the kitchen is unavailable, where will you prepare meals? If a bathroom is being remodeled, is there another one available? If the bedroom is disrupted, where will you sleep?
Good preparation makes the project less chaotic. The work may still be messy, but at least it will be organized mess, which is a slightly more civilized species.
Get Quotes and Agreements in Writing
If you are hiring professionals, get written quotes before work begins. A good quote should describe the work, materials, labor, payment schedule, estimated timeline, and any exclusions.
Do not choose a contractor based only on the lowest price. Consider experience, references, communication, licensing, insurance, reviews, and how clearly they explain the work. A vague quote can become a problem later if expectations are different.
Ask questions before signing. Who is responsible for permits? Who buys materials? What happens if hidden damage is discovered? How are change orders handled? What is the payment schedule? What cleanup is included?
A written agreement protects both sides. It reduces confusion and gives the project a clearer structure.
Plan for Cleanup and Finishing Touches
The project is not truly finished when the last piece is installed. Cleanup and finishing touches matter. Dust needs to be removed. Tools need to be put away. Paint may need touch-ups. Furniture needs to be returned. Decor needs to be placed. Trash and old materials may need disposal.
Include cleanup in your plan. If you are hiring a contractor, ask what cleanup is included. If you are doing the work yourself, schedule time for it. Do not assume you will feel like deep cleaning after a full day of painting or installing shelves.
Finishing touches are also important. A new room can feel incomplete without lighting, textiles, art, plants, or practical organization. These details do not have to be expensive, but they help the finished project feel intentional.
Final Thoughts
Planning a home improvement project before you start may not feel as exciting as picking colors or swinging a hammer, but it is the step that makes everything else easier. A good plan helps you define the goal, control the budget, choose materials, understand the timeline, prepare the space, and avoid unnecessary surprises.
Start with a clear purpose. Define the scope. Set a realistic budget. Gather focused inspiration. Measure carefully. Decide what you can do yourself and what requires a professional. Check permits. Choose materials early. Prepare for disruption. Get written agreements when hiring help. Leave time for cleanup and finishing details.
A home improvement project does not need to be perfect to be successful. It needs to be thoughtful, realistic, and well managed. When you plan first, the work becomes less stressful and the finished result is more likely to match the vision you had in mind.
The best projects begin long before the first tool comes out. They begin with clear decisions, honest numbers, careful measurements, and a plan sturdy enough to survive the surprises hiding behind the drywall.
More Stories
Change Your Living Spaces: Interior Design Hacks
Designing an Office Around How Your Business Operates
How to Plan a Desert Move Without Melting Down: A Practical Guide to Relocating in Southern Utah
The Moving Mistakes Most People Only Make Once (And How to Avoid Them the First Time)