
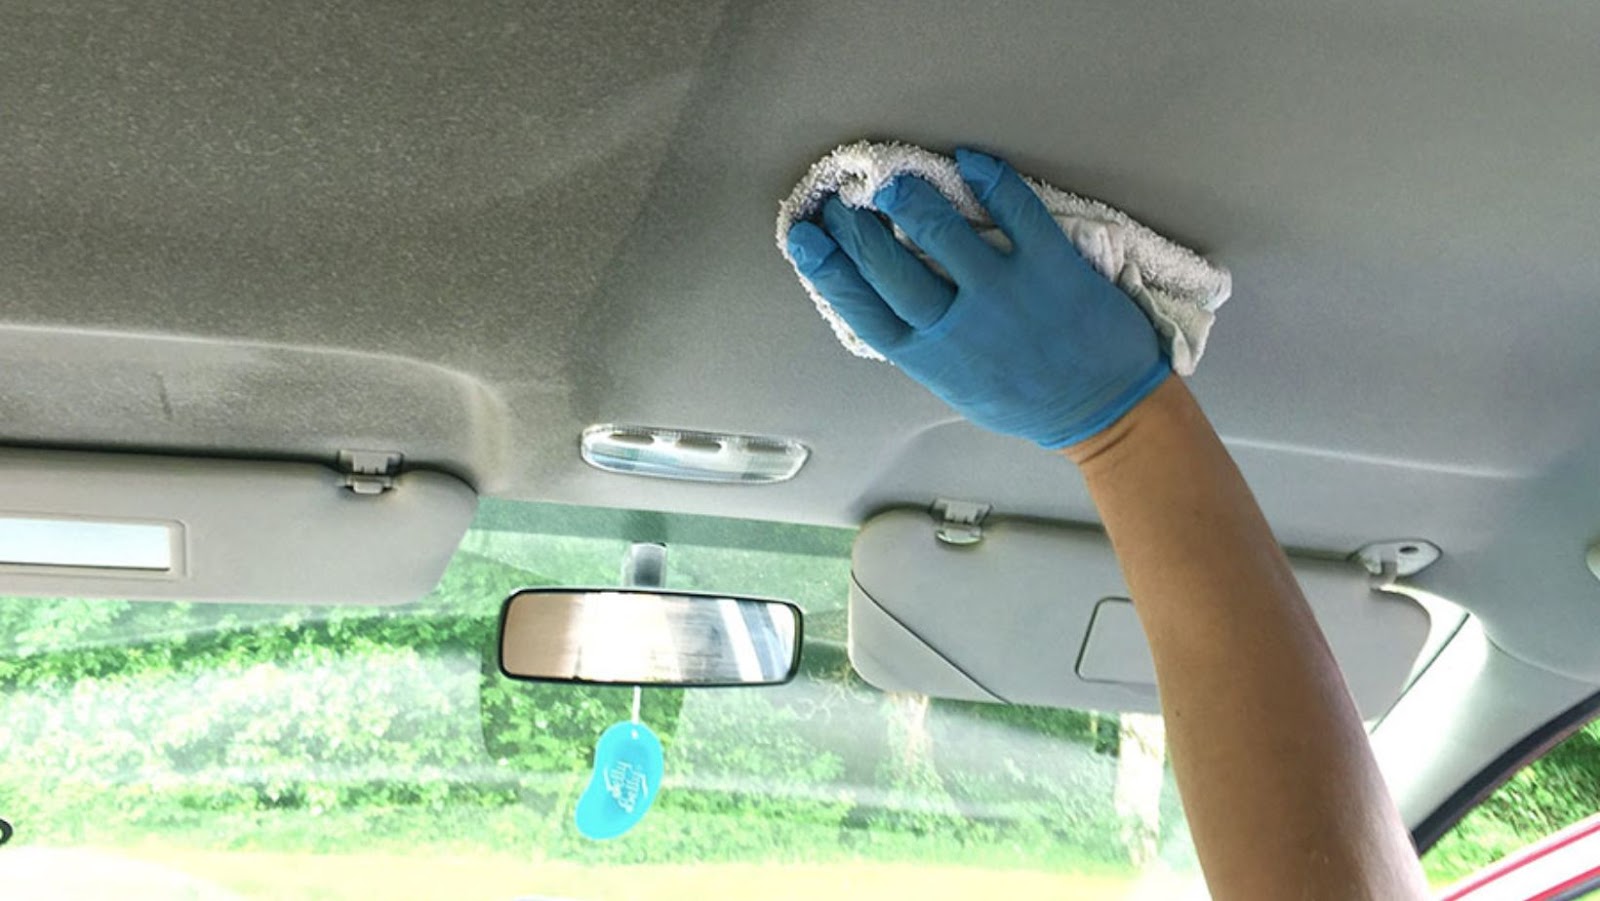
Regular maintenance of your car’s interior is important in order to keep it in great shape. One of the areas that often gets neglected is the car interior roof, which can collect dirt, dust, and debris over time. Cleaning the car interior roof can be a daunting task, but with the right products and techniques, it can be relatively easy and hassle-free.
How to clean car interior roof at home
In order to properly restore your car’s interior roof and keep it looking like new, it is important to have all the necessary materials on hand. You will need a vacuum, microfiber towels, a soft scrub brush, detergent (either liquid or spray-on) and some white vinegar. Additionally, you may need a soft bristled brush or sponge if the material of your car roof requires more scrubbing. For heavily soiled areas you may also need a car upholstery cleaner such as foam cleaner or rubbing alcohol.
Once you have gathered all of these materials then you are ready to proceed with cleaning the roof of your car’s interior:
- Vacuum
- Microfiber towels
- Soft scrub brush
- Detergent (either liquid or spray-on)
- White vinegar
- Soft bristled brush or sponge (if necessary)
- Car upholstery cleaner such as foam cleaner or rubbing alcohol (if necessary)
Vacuum the car interior roof
Cleaning the interior roof of a car is an important step in the overall maintenance and care of a vehicle. Even hard-to-reach areas, like the back of the car interior roof, must be cleaned regularly to remove built up dust and debris. Vacuuming is a simple task that can help restore the inside of your car and make it look new again.
Start by emptying out any trash or belongings left in your car as these will only get in your way later on. It’s also important to remove any mats or floor mats for more efficient vacuuming. Use furniture polish on any leather areas you may have to keep them looking good throughout the cleaning process.
Attach a crevice tool or brush attachment onto your vacuum cleaner so you can easily reach into all those tight spots between the vehicle’s headrests, cup holders, and sun visors. The main aim is to move as much dust and dirt off as many surfaces as possible at once as this will help you get into those hard-to-reach corners quickly. Make sure that when vacuuming, stay away from any hoses, knobs, speaker grilles and instrument panels which could become damaged if rubbed against too harshly with the vacuum cleaner; use caution when brushing over loudspeakers so they don’t become scratched or damaged due to static electricity generated by friction between surfaces.
Once you are finished with all visible surfaces, including seats and foot wells, move onto hoovering around all window sills, door jams, door pockets and glove compartments before finishing up with suctioning dirt away from vents or air ducts using accessories such as long thin brush attachments or thin crevices tools which can be found on most standard vacuum cleaner models available today. Be careful when cleaning around electronic components too; use only anti-static cloths (which come with some cleaners) for extra protection on these sensitive parts of your car during sanitation processes like this one!
Remove stubborn stains using a brush and cleaning solution
Removing stubborn stains on your car interior roof can be a daunting task, but with the right techniques, you can restore the original beauty of your vehicle. Start by vacuuming and spraying the area with an all-purpose cleaner like Simple Green All-Purpose Cleaner & Degreaser. Then scrub the stains with a brush, using a circular motion. Work in small areas to avoid smearing the cleaning solution onto nearby surfaces.
For best results, use hot water and another cleaning agent such as White Knight NaturO XP Mold & Mildew Stain Remover for extra strength cleaning power. Follow the instructions on product labels and wear protective gloves to avoid skin irritation. Avoid using detergents or abrasive cleaners as these can damage your car’s cabin interior roof material(s).
Wipe down any excess cleaner solution with a microfiber cloth or sponge, paying close attention to rinsing out any trapped cleaning solution from hard-to-reach places such as seams and around buttons or trims. Finish up by wiping all surfaces with a clean dry cloth and let air dry before applying any protectant or applying seat covers over them, if desired.
Follow these tips for an easy way to remove tough stains from your car interior roof at home:
- Vacuum and spray the area with an all-purpose cleaner.
- Scrub the stains with a brush, using a circular motion.
- Use hot water and another cleaning agent for extra strength cleaning power.
- Wear protective gloves to avoid skin irritation.
- Avoid using detergents or abrasive cleaners.
- Wipe down any excess cleaner solution with a microfiber cloth or sponge.
- Finish up by wiping all surfaces with a clean dry cloth and let air dry.
Cleaning the Car Seats
Keeping the interior of car well-maintained and clean is important in order to ensure your car looks great and is comfortable. Cleaning the car seats should be the first step in restoring your car’s interior.
In this section, we will provide some tips to cleaning the car seats at home with household items. These tips make the cleaning process quick and easy and can help to restore the look of your car seats:
- Tip 1
- Tip 2
- Tip 3
- Tip 4
- Tip 5
Remove dust and dirt using a vacuum cleaner
Cleaning the car seats is an important part of car maintenance to keep your car’s interior looking like new. The first step in this process is to remove the dust and dirt from the seats using a vacuum cleaner. Vacuum cleaners are effective tools that can easily reach areas that traditional cleaning methods might miss. It is important to use a soft brush attachment with the vacuum cleaner so that it does not scratch or damage the surface of fabric or leather seats. Make sure to get into all the nooks and crannies, such as between cushions, around armrests, along seams and upholstery corners.
Once you have thoroughly vacuumed, move onto cleaning with damp cloths and/or detergents.
Spot clean stubborn stains using a brush and cleaning solution
Spot cleaning stubborn stains on your car seats can be a tricky task, especially for set-in stains that have been sitting around for a while. The best way to effectively remove spots from your car upholstery is to use a brush and a cleaning solution of your choice.
Start by vacuuming the area using an upholstery attachment. This will help to lift any dust, dirt and debris that may be causing the stain in the first place. It also serves to help remove any larger pieces of dirt when spot cleaning stubborn stains. Once the area is thoroughly vacuumed, use a soft-bristled brush or an old toothbrush dipped in a solution of warm water and detergent or white vinegar and warm water. Rub gently at the stain in small circular motions until all traces of it have been removed.
If you find yourself dealing with harder-to-remove spots, try using rubbing alcohol or nail polish remover (acrylic or non-acetone). Test the product on a small section of fabric first before applying it onto large areas to make sure you haven’t caused discoloration elsewhere within the interior space. Use an absorbent cloth and dab the liquid out – starting at its outer edges – until all traces of liquid have been soaked up from within the fabric’s underneath layers. Allow time for drying before repeating these steps as necessary or moving onto other areas with similar spots or stains.
Apply a fabric protector to the car seats
Having clean and odor-free car seats is important for the feel, look, and longevity of your vehicle. To keep your upholstery in its best condition, it’s important to apply a fabric protector. This will help to wick away excess moisture and dirt that can quickly build up from day-to-day use and activities in your car. Fabrics that are not properly maintained are more likely to be stained, discolored and different textures can develop over time which usually cannot be reversed without expensive repairs or replacements.
There are a number of options when it comes to fabric protection products. If you prefer natural elements, any kind of oil such as coconut oil or mineral oil can be applied directly onto the fabric using an absorbent cloth material. Alternatively, if you prefer more commercial options then there are plenty available on the market designed specifically for car upholstery such as Scotchgard™ Fabric Protector Spray or No Vac Aerosol Upholstery Protector Spray that can help protect against both liquids and dirt while giving fabrics long lasting protection from spills and stains.
When applying any type of fabric protector follow the instructions provided in order to get the best results – this includes allowing for drying time between coats for maximum effectiveness. It’s also important to remember that there may be a slight change in appearance when applying these types of sprays so it’s recommended to test an area before full application as some fabrics may change texture or color when this treatment is applied. However, overall having a good fabric protector on your car seats will prolong the life span of your upholstery significantly!
To keep your car smelling fresh after a deep clean, it’s worth checking out what is the leading car air freshener to find a scent that suits your style.
Cleaning the Car Dashboard
Taking care of your car dashboard is one of the most important steps in restoring your car’s interior. The dashboard is the focal point of the car, and if it isn’t maintained properly, your entire car’s interior will look old and worn.
In this section, we’ll go over some tips and tricks that you can use to help keep your dashboard looking beautiful:
Wipe down the dashboard using a damp cloth
When cleaning the car dashboard, it is important to start with a gentle approach. Wipe down the dashboard using a damp cloth to remove any dust or dirt. Work in small sections, wiping away any dust or dirt that accumulates. Be sure to check between all of the crevices and gaps before moving on to the next section. You may need to use a vacuum setup with a brush attachment or an air compressor if necessary, particularly in areas that have built-up grime or dirt.
Next, use a soft microfiber cloth with some mild car cleaner and wipe down each area of your dashboard. Depending on how often it has been cleaned, you may need to repeat this step several times for a thorough cleanse. Pay special attention to those areas where dirt and dust tend to settle such as:
- Air vents
- Knobs
- Frames around the keys
All of which can affect overall interior appeal as well as providing an opportunity for bacteria and allergens to accumulate more easily. Finally, mist your microfiber cloth with water spray if necessary for difficult spots and once you’ve completed our cleaning task allow your dashboard up dry completely before putting everything back together again.
Use a cleaning solution to remove stubborn stains
For stubborn, oily or greasy surfaces like the car’s dashboard, it is best to use a cleaning solution. Mix mild detergent with warm water and use a soft cloth to apply the soapy water to the dashboard. After the dashboard has been wiped dry, repeat the process with a vinegar and water solution. This will help remove any remaining residue from the surface.
It is important that you do not apply too much pressure when cleaning, as this can lead to damage or scratching of the interior surface. Additionally, avoid using any harsh chemicals or abrasive cleaners as this can cause further damage to the dashboard. When finished, make sure that you use a microfiber towel or something soft and lint-free for drying off any excess liquid.
Apply a protective coating to the dashboard
It’s important to keep your car’s interior looking nice, so one of the best ways to protect it is by applying a protective coating. This protects the dashboard from daily wear and tear and UV rays from the sun, which can make it fade over time. Applying a protective spray or wax is a good idea before you start cleaning your car dashboard.
The product you choose will depend on the materials in your car’s interior: leather, vinyl, plastic and more. Manufactures typically make wipes that are safe for all these materials but there are specialized coats available to treat individual surfaces. Leather requires regular conditioning to keep its luster and coatings that prevent UV rays like leather cream can also be applied. Vinyl needs to be lubricated with a soft cloth after applying an artificial conditioner. Plastic requires air-dry products like vinyl protectants that seal out dirt and prevent cracking.
Always read labels carefully and be sure to test any new product on an inconspicuous area before use. That will help avoid discoloration or damage due to incompatible products or chemicals used during cleaning or protection processes. Consult your car manual for specific care instructions or get advice from professionals if you need extra help with this step!
Cleaning the Car Windows
The car windows are often one of the most neglected aspects of a car interior. Cleaning them can make a huge difference in the overall appearance of your vehicle.
In this section, we’ll discuss the best ways to clean car windows and get them looking their best. We’ll look at some tips for restoring the shine and clarity of the windows, as well as the best techniques for removing stubborn dirt and grime from them:
Use a glass cleaner to clean the windows
To get crystal-clear car windows, start by choosing a good glass cleaner. Non-ammonia-based glass cleaners are recommended as ammonia can cause damage to the window tint, cars paint and vinyl surfaces inside your car. Some common non-ammonia glass cleaners are Windex Ammonia Free Glass Cleaner and Invisible Glass Cleaner.
To avoid streaking, spray the cleaning solution directly onto the microfiber cloth instead of the window itself and wipe in circular motions with light pressure until the window is clean and free of spots or streaks. If you have stubborn stains or need extra cleaning power, use a soft bristle brush dipped in warm soapy water to scrub away stuck-on grime, then finish off with a final swipe of your dry microfiber cloth to dry any remaining moisture on the surface of the windows.
Use a microfiber cloth to remove dirt and dust
When cleaning your car’s interior roof and windows, it is important to choose the right cleaning tools. For removing dirt and dust, a microfiber cloth is the recommended choice due to its soft properties that won’t cause scratches while wiping away dirt. You can also use a damp cloth to remove any stubborn stains or marks. This type of cloth should be machine washable and dryer-safe for reuse. It may be tempting to use paper towels for quick clean ups instead, but paper towels are too abrasive and can cause scratches that are difficult to remove.
Begin by lightly brushing away obvious debris from the surface with a cloth brush or vacuum if you have one available. Start at one corner of the window and slowly move in an ‘S’ motion along the entire window surface until all dirt has been removed. Then you can moisten a microfiber cloth with water for tougher marks or splatters before buffing it dry with another clean microfiber cloth for a streak-free shine!
Don’t forget to clean up those small cracks between panels and around buttons where dust particles tend to accumulate as well:
- Lightly brush away debris with a cloth brush or vacuum.
- Move in an ‘S’ motion along the entire window surface until all dirt has been removed.
- Moisten a microfiber cloth with water for tougher marks or splatters.
- Buff it dry with another clean microfiber cloth for a streak-free shine.
- Clean up small cracks between panels and around buttons.
Apply a protective coating to the windows
Applying a protective coating to your car windows can help reduce scratches and minimize the buildup of dirt and debris. Commercial window protectants are available in both liquid and spray form, offering a glossy finish that also works to repel water. To apply the protective coating, just follow these simple steps:
- Make sure you have all the necessary supplies (including a quality window protectant, clean cloths or sponges, glass cleaner, etc.) before you begin.
- Thoroughly clean your car windows with glass cleaner and a microfiber cloth. This will help remove dirt and dust that could potentially keep the protective coating from sticking to your windows properly.
- Once they’re clean and dry, apply an even coat of window protectant to both sides of your car windows using a sponge or cloth. Make sure you spread the product evenly onto the window surface.
- Let the protective coating dry for at least 20 minutes before driving or washing your car again. If you need to speed up this process, use a hairdryer set on low heat for about 5 minutes instead.
Cleaning the Car Carpets
Keeping your car’s interior in great condition can enhance the overall look and feel of your car. Cleaning the carpets is one way to help do this. Here are some tips on to quickly and effectively clean your car’s carpets.
This section will cover the best practices for cleaning car carpets, from the floor mats to the roof of your car:
- Vacuum the carpets thoroughly.
- Use a carpet cleaner or shampoo to help remove any stains.
- Allow the carpets to dry completely before putting them back in the car.
- Apply a protectant to the carpets to help keep them looking new.
Vacuum the carpets to remove dirt and dust
Before you begin cleaning your car’s carpets, it’s important to make sure that they are free of dirt and dust. Vacuuming is the best way to remove all debris from the carpets so that any cleaning solution you use will be more effective.
Start by vacuuming the entire floor of your car, which includes all four sides – including behind the seats – and pay special attention to areas where dirt may have accumulated. Once you’ve vacuumed, it may be helpful to use a portable brush to loosen any stubborn dirt particles. If your car has leather seats, use a soft cloth or microfiber towel with a dab of leather cleaner before vacuuming them. Finally, finish off by brushing the seams of each carpet with an old toothbrush or scrub brush to remove any trapped dirt or hair. Repeat this process as needed until you feel that the carpets are clean.
Use a carpet cleaner to remove stubborn stains
Carpets, especially in cars, can suffer from spills, mud, and other messes. To remove any tough stains or buildup from ground-in dirt, you may need to use a carpet cleaner or shampoo.
Start by using a vacuum cleaner to get rid of surface dirt and debris. Once vacuumed, use the carpet cleaner on a small section at a time and work it in using a soft brush. Some products may require you to let it sit for 10 minutes before vacuuming again to remove the excess cleaner and loose dirt. Make sure not to scrub too hard or saturate the carpet so that it does not shrink or bleed.
Once finished with the carpeted areas of your car, finish off with an all-purpose cleaner on any upholstery surfaces such as dashboards and door panels.
Apply a fabric protector to the carpets
Before you apply a fabric protector to your car carpets, make sure they are clean and free of dirt, dust, and foreign material. You can vacuum the floor and use a damp cloth to wipe away any spots or stains for a more thorough cleaning. After thoroughly vacuuming the carpets and cleaning spots or stains you may need to apply fabric cleaner depending on the type of carpet in your car.
When applying a fabric protector, it is important to note that the protection can take up to an hour or two to dry depending on how much product you have used. You will also want to make sure that there are no windows or doors left open during this process in order to prevent dirt from entering the interior while drying.
When working with a pre-treated fabric protector it is important not to overapply due to its ability to create oversaturation which could cause foaminess when dried in some cases. When applying pre-treated fabric protectors it is best practice to:
- Work in small areas and not saturate the entire area at once for best results.
- Read the product’s instructions carefully as some products may have special techniques or even specific directions for certain types of fabrics.
- Limit your contact with applied areas until completely dry as doing so could cause staining or smearing of product onto clothes while transferring from seat-to-seat in your car’s interior.
- Follow all instructions carefully to avoid permanent damage.
More Stories
GoodNever: The Radical Habit That Fixes Bad Habits for Good (2026 Guide)
Phuket Property 2026: The 5 Leading Agencies for Foreign Purchasers
Understanding Housing Options for Travel Nurses: What You Need to Know
Emergency Preparedness: How to Access Well Water During a Power Outage